How to Make Podcast Clips for YouTube Shorts and Reels
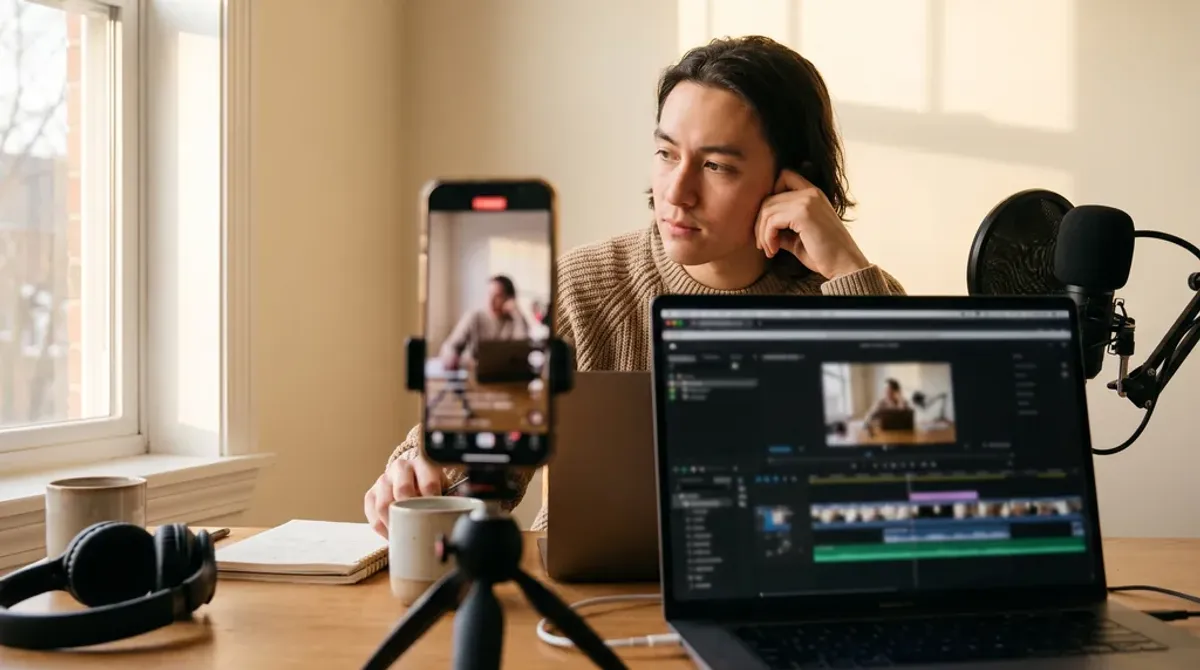
Repurpose your podcast into video: how to find the two or three podcast clips worth cutting from each episode, format them, and post them on a schedule.
Repurposing one hour-long episode into video gives you enough material for a few weeks of social posts, and most hosts never get it out. What decides whether podcast clips work is which 45 seconds you pick, rather than the editing software or the export settings. Clips get ignored because the chosen moment only makes sense to somebody who heard the twenty minutes that came before it.
The work splits into three parts, and they have to happen in this order:
- Pick the moment, either while you are recording or while you are reading the transcript afterward.
- Produce it, which means cropping, captioning, and exporting to the right shape.
- Post it, natively, on a schedule you can keep.
Selection is the part worth being fussy about. The other two are mechanics you can learn once and repeat every episode.
Start by recording something you can cut
Good clips start before the edit. Three decisions you make at recording time, about the camera, the audio, and the shape of the conversation, set how much usable material the episode gives you.
Turn the camera on
Turn the camera on even if you publish audio only. A webcam or a phone at eye level, with a window or a lamp in front of you rather than behind, gives you footage you can crop later. Record at the highest resolution your setup allows, because a vertical crop throws away most of the width of a horizontal frame and you want pixels to spare.
Two recording habits make clipping much faster later:
- Record each speaker on a separate audio track, so a clip of one person can be balanced without the other person’s room noise underneath it.
- Keep your framing consistent through the episode, because a crop that works at minute four should still work at minute fifty.
💡 Separate tracks
Record each speaker on a separate audio track. You can balance one voice later without dragging the other person’s room noise with it.
Get the audio right in the room
Audio matters as much here as framing, since a 45-second cut has nowhere to hide a hollow-sounding room. The fixes for remote podcast audio are the same ones that make the full episode usable.
Build the episode out of standalone answers
Planning your episode structure around a handful of standalone answers also does a lot of the work for you. If the episode has a clear question at the top of each segment and a real answer underneath it, the clip candidates are already sitting there in the recording. Apple’s native video support gives that camera file another use as well, inside the podcast apps rather than only on social.
How to find the two or three podcast clips worth cutting
A moment is clippable when four things are true of it:
- A specific claim, a number, or a strong opinion.
- The reason or the example behind that claim, so the viewer gets a whole thought.
- No unexplained references to something said earlier in the conversation.
- An ending that resolves instead of trailing into the next question.
Apply that test honestly and an hour-long interview yields two or three moments, sometimes only one. That is the normal result, and it beats ten clips where seven of them need context nobody has.
Mark them while you record
The cheapest way to find clips is to notice them as they happen. Keep a sheet of paper next to you and write the time whenever an answer lands well. If you are watching a timer in your recording software, the timestamp takes two seconds to jot down.
You can also shape the moment in real time. When a guest says something strong but tangled, you have two moves:
- Ask them to say it again in one sentence, and keep the tighter version.
- Ask a short follow-up that prompts a self-contained version of the same answer.
Hosts who do this routinely end up with clips that need almost no editing, because the guest has already done the tightening.
Hosts who do this routinely end up with clips that need almost no editing, because the guest has already done the tightening.
Or scan the transcript afterward
If you did not mark anything, the transcript is faster than scrubbing the audio. Read it and look for the places where a claim is followed by a reason. Four cues find most of them:
- “the biggest mistake”
- “what most people get wrong”
- “for example”
- any sentence with a number in it
Those are usually where a complete thought sits. When you find a candidate, read that paragraph on its own with no surrounding text:
- If you understand it cold, note the in and out timestamps and move on.
- If you had to reach for context, skip it.
Three or four candidates marked this way usually reduce to two clips once you check how they sound rather than how they read.
The formats, and what each one is for
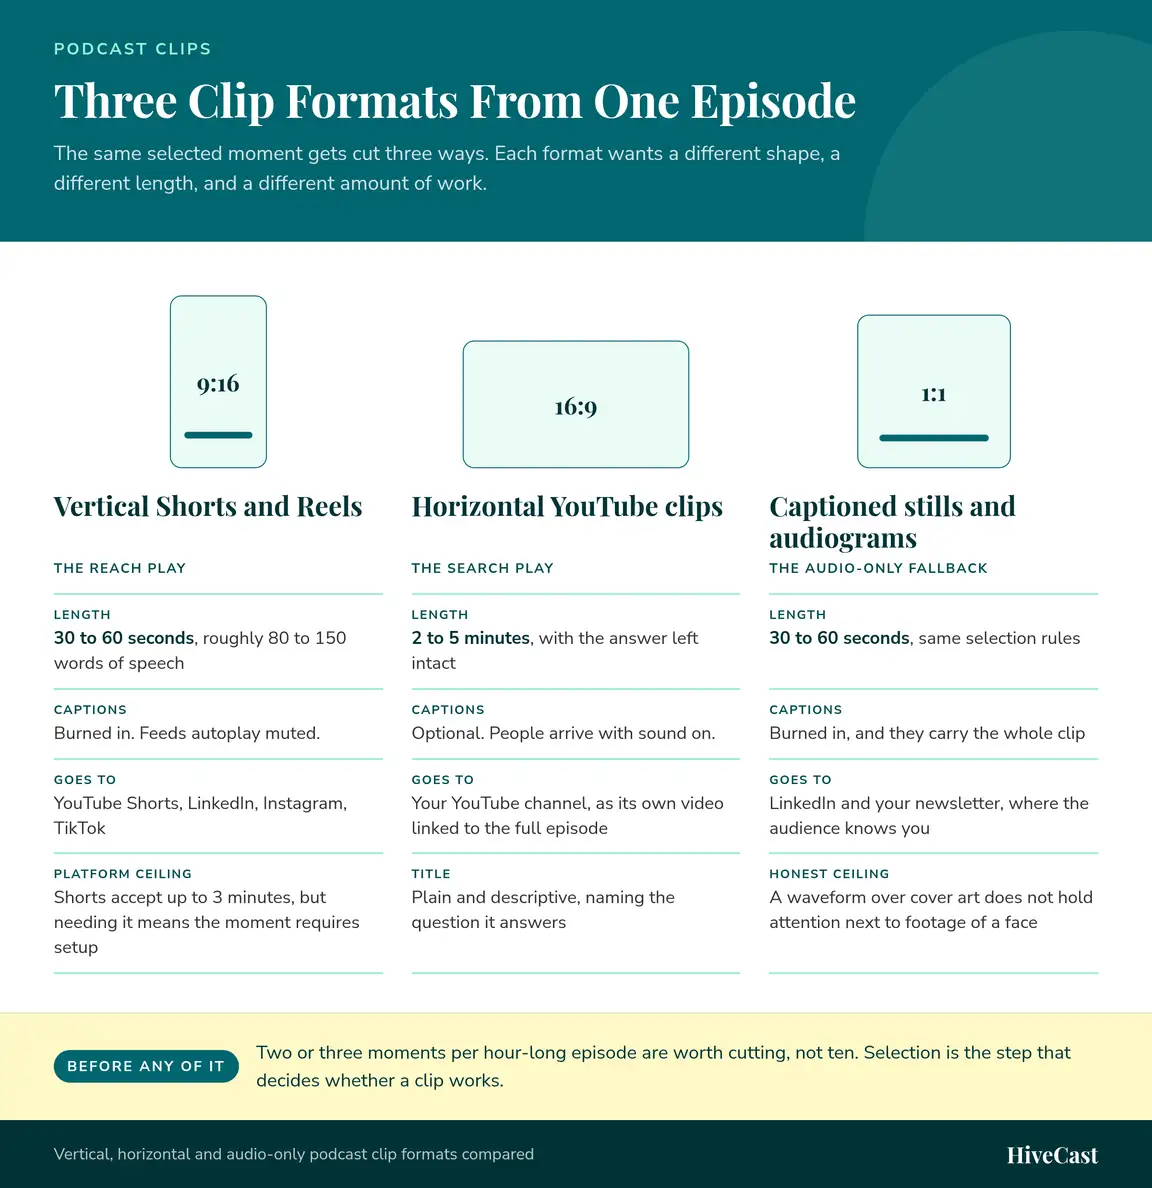
Podcast clips are not one thing. The same selected moment gets cut three different ways depending on where it is going, and the three formats want different lengths, different shapes, and different amounts of work:
- Vertical clips are the reach play.
- Horizontal YouTube clips are the search play.
- Captioned static clips are what you are left with if you recorded audio only.
The sections below cover each one in that order.
Vertical Shorts and Reels
Vertical clips are the format most hosts mean when they say podcast clips. They reach people who have never heard your show, so length and the opening seconds matter more here than in either of the other formats.
Length and shape
Vertical clips are 9:16 and short. Aim for 30 to 60 seconds, which is roughly 80 to 150 words of speech. YouTube Shorts accepts vertical video up to three minutes, so you have headroom, but needing it is usually a sign the moment requires setup.
The first two seconds
Three rules for the opening of a vertical clip:
- Open on the speaker already talking. No countdown, no title card.
- Put the strongest line of the clip on screen as a caption straight away.
- Cut the run-up. The show intro, the logo animation, and the “welcome back to the podcast” greeting all get scrolled past before they finish.
Horizontal YouTube clips
Horizontal clips are a different job. These run 2 to 5 minutes, stay 16:9, and get uploaded as their own videos with a title that describes the question being answered. People reach them through search and through your channel rather than through a feed, so a plain descriptive title beats a clever one.
Two things to get right on every upload:
- Link back to the full episode in the description.
- Keep the answer intact rather than trimming for pace.
This is the format that compounds, because a well-titled clip keeps surfacing for months, which is part of why YouTube is worth setting up properly for a show that already exists in audio.
Captioned static clips and audiograms
If you have audio only, be realistic about the ceiling. An audiogram, meaning a waveform animating over your cover art, sits in the same feed as footage of people’s faces and does not hold attention next to them. It is still worth producing for an audio-only show, and it works best in a newsletter or as a regular post to an audience that already follows you.
The better audio-only options are:
- A captioned clip over a single strong still image of the speaker.
- A quote card with the line typed out and the audio attached.
Both are reasonable uses of an audio-only file, and both take more work to get noticed than a clip with a person’s face in it.
Captions, framing, and export settings
Once you have picked a moment and a format, the remaining work is finishing. These settings apply to every clip you export, and getting them right once means you can reuse them on every episode.
Captions
Burn the captions into the video rather than relying on platform captions. Most social feeds autoplay muted, so the caption is how the first few seconds get read at all. Auto-generated text gets names, brands, and technical terms wrong, so read the captions once before export and fix the spellings. The W3C’s guidance on captions is the reference worth knowing: captions are a text version of everything in the audio that a viewer needs in order to follow it, which is a higher bar than a rough transcript.
💡 Before you publish
Auto-generated captions often get names and brands wrong. Read them once before export and fix the spelling.
Framing
- Keep captions and any text out of the bottom quarter and the right edge of a vertical frame, because that is where platform interface elements sit.
- Put the speaker’s face in the upper middle of the frame, with the eyes near the top third.
- Check the first frame of the clip on its own, since that frame is what appears as the thumbnail in a lot of placements.
- If the clip features a guest, put their name and title on screen once, early, then let it go away.
Audio
Keep the loudness consistent across clips and leave headroom so nothing clips at the peaks. A clip that arrives noticeably louder or quieter than the last one reads as careless even when the content is good. That consistency comes out of the same podcast audio editing pass that levels the full episode, so clips pulled from a properly mastered file need very little work here.
Where each clip goes
Each format has a home:
- Vertical clips go to YouTube Shorts, LinkedIn, Instagram, and TikTok. Upload the file natively to each platform rather than posting a link, and write the caption text for that platform instead of pasting one caption everywhere.
- Horizontal clips go on your YouTube channel as standalone videos, each one linked to the full episode.
- Static clips and quote cards work best on LinkedIn and in your own newsletter, where the audience already knows the show.
Then use the clips on your own site. Embedding one near the top of the episode page gives a visitor a 40-second preview before they commit to an hour, and it gives the page something to look at. If a clip does get traction, an automated reply flow is a practical way of turning clips into leads without answering every comment by hand.
A clipping cadence you can keep
Attach clipping to your production routine rather than to a content calendar. The routine that holds up has four steps per episode:
- Mark moments while you record. Two seconds of note-taking each time an answer lands.
- Pull the two or three clips when the edited episode comes back. The selection is already done.
- Caption and schedule them in the same sitting. Splitting this across days is where clips die.
- Publish one at launch and one later in the week, so a single episode covers more than one day.
On a weekly show, three clips per episode is about twelve posts a month. On a bi-weekly show it is six. Those numbers are small enough to sustain, which matters more than the size of any single batch. Sitting down to make thirty clips in one afternoon almost always ends with twenty of them never getting posted.
When to hand it off
Doing this yourself costs roughly 30 to 60 minutes per clip once you include selection, captioning, and scheduling. The parts that slip first are captions and posting, which are also the parts that decide whether the clip works.
HiveCast has produced more than 5,000 episodes, and podcast clips sit alongside the rest of the workflow rather than inside it. What that looks like in practice:
| What it covers | Bi-weekly show | Weekly show |
|---|---|---|
| Core podcast production: the audio edit, SEO show notes, two promotional graphics, and publishing to the directories. Clips and video are not part of it. | $500/month | $875/month |
| Enhanced Marketing: three audio or video cutdowns per episode, posted as YouTube Shorts, plus your episodes on your website. | +$100/month | +$200/month |
| Full video podcast production: the custom intro and outro, motion graphics, per-episode cover art, and scheduling to your channel. | +$100/month | +$200/month |
Both add-ons are listed on our pricing page with everything that comes standard.
If you want to know how many usable clips are actually in your show, send us your last few episodes and we will tell you what we find. Book a call and we can go through it together.
Frequently Asked Questions About Making Podcast Clips
How do I turn my podcast into video clips?
Record the conversation on camera, even if you only publish audio, then pick two or three self-contained moments from the episode. Cut each one to between 30 and 60 seconds, crop it to vertical, burn in captions, and give it a title that states what the clip is about. If you recorded audio only, your options are a captioned static clip or a quote card, which is why turning the camera on next time is worth the small amount of setup.
How long should a podcast clip be?
For vertical Shorts and Reels, aim for 30 to 60 seconds, which is roughly 80 to 150 words of speech. YouTube Shorts accepts vertical video up to three minutes, but a clip that runs long usually means you picked a moment that needs setup to make sense. Horizontal YouTube clips are different: those can run 2 to 5 minutes because people arrive at them from search or from the episode page and expect a full answer.
Do podcast audiograms still work?
A waveform animating over static cover art is the weakest clip format, but it is still worth producing if your podcast is audio only. It works best in a newsletter or as a post to an audience that already knows your show. If a clip is meant to reach people who have never heard you, put a face or readable text on screen instead.
Do I need to record video to make clips?
You need video to make good ones. A webcam or a phone at eye level is enough, and the file gets used for vertical crops, horizontal YouTube clips, and the video feeds inside the podcast apps. Without video you can still make captioned static clips and quote cards, but they compete against real footage in the same feed.
How many clips should I make per episode?
Two or three per episode is the realistic number, and three is the cap for most hour-long interviews. Beyond that you start cutting moments that need context to land, and those are the ones that get scrolled past. Consistency matters more than volume here: three clips per episode every week is better than twenty clips once a quarter.
Does HiveCast make clips for you?
Yes, through two paid add-ons rather than core production. Our Enhanced Marketing add-on covers three audio or video cutdowns per episode, posted as YouTube Shorts, and adds your episodes to your website, at +$100/month on the bi-weekly plan or +$200/month on the weekly plan. Video and YouTube production is a separate add-on at the same prices, covering the custom intro and outro, motion graphics, cover art, and scheduling to your channel.
Want this handled for you?
You record the episode, and HiveCast handles the editing, show notes, graphics, and scheduling. We have produced more than 5,000 episodes, and there are no long-term contracts.
More on Podcast Production
Related Articles
Podcast Audio Editing: The 5 Stages of a Professional Pass
Podcast audio editing covers cleanup, levels, content cuts, structure, and a final listen. Here is what a professional pass includes and how to judge one.

Podcast Episode Structure Explained: From Intro to Outro
Master podcast episode structure to boost listener retention and business growth. Get expert tips, segment strategies, and actionable steps. Start now!
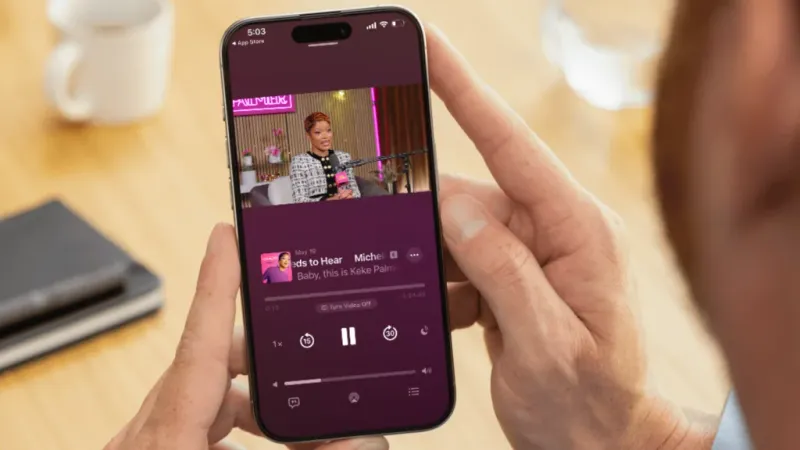
Apple Podcasts Just Added Native Video. Here's What to Know.
Apple Podcasts now supports native video. What podcasters need to know about the format, which hosts support it, and how it fits with YouTube.